echoPi build log #2 — one push, next note: 5 rules we set before placing a single part
What it is. A pocket slider that plays a preset song. Every push, in any direction, plays the next note of that song. The notes don't have to be neighbours on a keyboard, so a melody can leap around freely; the click you feel (log #1: a steel ball dropping into pits 3.33 mm apart) is just the trigger.
Where it stands. A closed-source consumer product, in development. Not for sale yet. Nothing below is a final layout.
Following along? Get the next build log and launch news by email.
Unsubscribe anytime. Privacy
Rules for the electronics, decided before the layout
- One product, one board. The whole circuit sits on a single PCB. Only parts that physically must sit elsewhere (the button dome, USB, the photo sensor that sees each push, the antenna, the cell) connect by flex.
- No hand-solder points. Every off-board part plugs in through a connector or FFC.
- Antenna at the end, so it still radiates when the slider is pushed open.
- USB-C on the tail end face, along the long axis; the Pi button sits at the other end.
- Zones before parts. Plan functional zones first and keep margin: radio short and at the end, charging next to USB, audio next to the speaker.
The controller is a Bluetooth LE chip from Nordic's nRF54L series, with external flash for the song library.
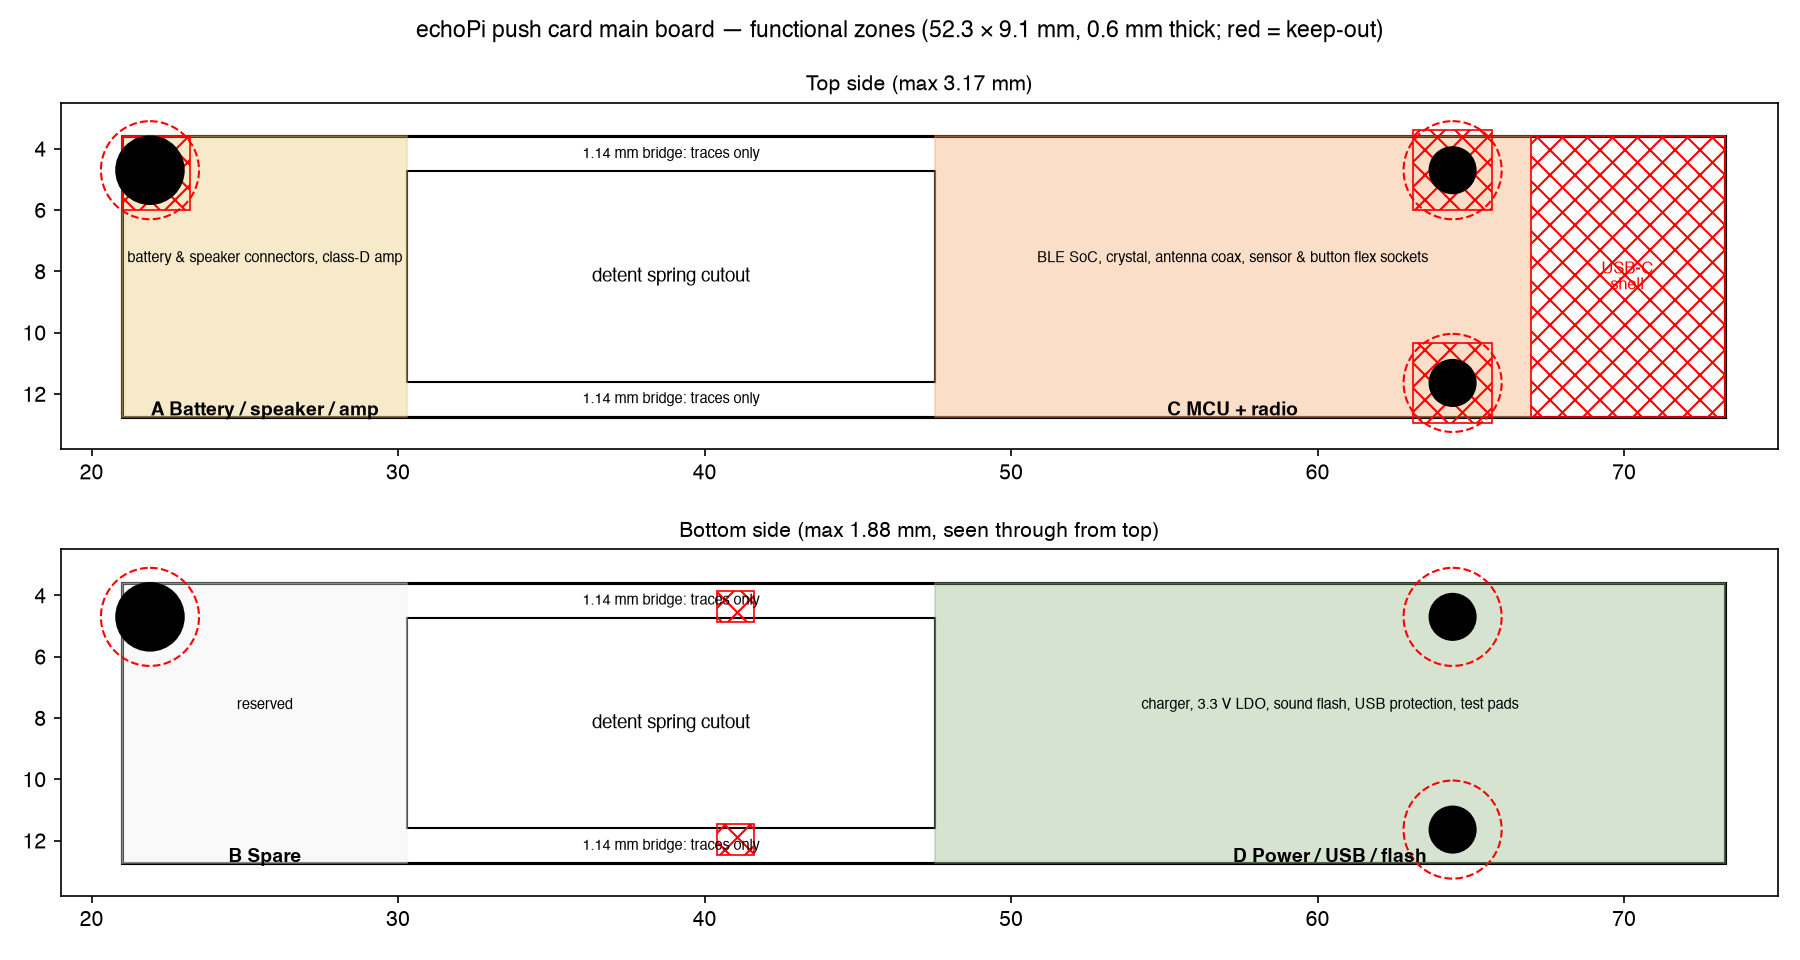 Functional zone plan, work in progress: the layout may change.
Follow along / get a note when it launches: https://echopi.ai/?utm_source=devlog
Follow the build. Get the next build log and launch news by email.
Unsubscribe anytime. Privacy